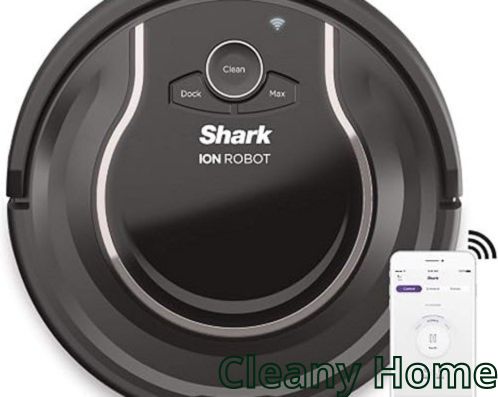
The Shark Ion Robot Vacuum is a popular and efficient cleaning device designed to make your life easier by automating the floor cleaning process. However, like any electronic device, there may be instances when you need to reset your Shark Ion Robot Vacuum to resolve issues or restore it to its default settings. In this comprehensive guide, we will walk you through the step-by-step process of how to reset Shark Ion Robot Vacuum.
Reasons for Resetting
- Technical Glitches: Like any electronic device, the Shark ION Robot may encounter technical glitches that affect its performance. Resetting can often resolve these issues by rebooting the system.
- Software Updates: After updating the firmware or software of your robot vacuum, a reset may be necessary to apply the changes and ensure smooth operation.
- Battery Calibration: If you notice issues with the battery, such as shorter cleaning sessions, a reset can help recalibrate the battery and improve its performance.
- Troubleshooting: Resetting is a common troubleshooting step for addressing specific problems such as connectivity issues, navigation problems, or sensor malfunctions.
What You Need To Know About Reset Shark ION Robot
What is A Factory Reset?
A factory reset of the Shark ION Robot involves restoring the robot vacuum to its original factory settings, erasing any customized configurations, schedules, and preferences that you may have set. This process essentially returns the device to the state it was in when you first purchased it. Performing a factory reset can be useful in various situations, such as troubleshooting persistent issues, clearing user data, or preparing the robot for a new owner. The specific steps to perform a factory reset may vary slightly depending on the model of your Shark ION Robot, so it’s crucial to refer to the user manual for accurate instructions.
Robot vacuums come with default settings, allowing users to customize preferences, like floor mapping. These settings are stored in the robot’s memory for easy future use. Preserving this data is crucial unless changing cleaning routines. User adjustments may lead to errors, especially with multiple features or extensive data.
Despite meticulous design, glitches can occur in real-life use. A common solution is a factory reset, reverting the robot vacuum to default settings. This erases all added data, making it like a new machine. Preferences, time-zones, language selections, and more are reset.
After a factory reset, users manually re-enter preferences, Wi-Fi details, and scheduling. Mapping data is deleted, requiring the robot to relearn the home layout. This reset can be done on the machine or through a mobile app. The type of data deleted varies, with a complete reversion or partial reset retaining basic information.
When A Factory Reset is Needed
Performing a factory reset on a Shark Ion Robot may be necessary in various situations to address specific issues or prepare the device for a new user. Here are common scenarios when a factory reset might be needed for a Shark Ion Robot:
- Persistent Technical Issues: When the robot vacuum experiences persistent technical glitches, malfunctions, or software issues that cannot be resolved through regular troubleshooting, a factory reset may provide a comprehensive solution.
- Clearing Customized Settings: Before selling or giving away the Shark Ion Robot, performing a factory reset is essential to clear all customized settings, schedules, and preferences. This ensures a clean slate for the new owner.
- Post-Software Update Problems: After a firmware or software update, if the robot vacuum encounters issues or inconsistencies in its performance, a factory reset may help apply the update more effectively and resolve any compatibility problems.
- Battery Calibration Issues: If there are problems with the robot vacuum’s battery performance, such as a shortened cleaning session or difficulty holding a charge, a factory reset may assist in recalibrating the battery.
- Troubleshooting Connectivity: In cases where the Shark Ion Robot faces challenges in connecting to Wi-Fi networks, mobile apps, or other devices, a factory reset may resolve connectivity issues and facilitate a fresh setup.
- Severe Navigation Problems: When the robot vacuum encounters consistent difficulties in navigation, mapping, or avoiding obstacles accurately, a factory reset may help recalibrate sensors and improve overall navigation.
- Preventing Recurring Issues: If a specific issue recurs despite previous attempts at troubleshooting, a factory reset may be a more comprehensive approach to resolving the problem.
- Preparing for New User: Before handing over the Shark Ion Robot to a new user, performing a factory reset is recommended. This ensures that the new owner can set up the device with their preferences and Wi-Fi credentials.
- User Preference Changes: If cleaning preferences or needs have changed significantly, and there is a desire to set up the Shark Ion Robot with a different configuration, a factory reset can provide a clean slate for customization.
Always refer to the specific user manual for your Shark Ion Robot model for accurate instructions on performing a factory reset. This ensures that the process is executed correctly and effectively.
More useful information:
- Why is Your Shark Vacuum Brush Not Spinning? [Solved]
- How to Fix the Brush Roll Indicator Shark Light Red?
- Shark Vacmop Cleaning Solution Alternative [4 Fantastic Options]
Other Methods You Could Try Before Performing A Factory Reset
Steps to Reset Shark Ion Robot Vacuum
Follow these steps to reset your Shark Ion Robot Vacuum:
- Step 1: Power Off the Robot Vacuum
Make sure your Shark Ion Robot Vacuum is turned off. If it’s in the middle of a cleaning cycle, let it complete the cycle or manually stop it.
- Step 2: Disconnect from Power
Unplug the charging dock or remove the robot vacuum’s battery, depending on your model. Ensure there is no power source connected to the robot.
- Step 3: Check for Physical Blockages
Before resetting, inspect the robot vacuum for any physical blockages, tangled hair, or debris that might be hindering its performance. Clear any obstructions that you find.
- Step 4: Reset Button (if available)
Some Shark Ion Robot Vacuum models come equipped with a reset button. If your model has one, locate the reset button and press it. Hold the button down for a few seconds until you see some indication that the reset is in progress.
- Step 5: Factory Reset (if needed)
If the reset button doesn’t resolve the issue, you may need to perform a factory reset. Please refer to your user manual for model-specific instructions on how to initiate a factory reset. This usually involves a combination of button presses or a sequence of actions.
- Step 6: Reconnect and Power On
After completing the reset or factory reset, reconnect your Shark Ion Robot Vacuum to the charging dock or insert the battery. Power on the robot, and it should start up with the default settings.
- Step 7: Reconfigure Settings (if necessary)
If you had customized settings on your Shark Ion Robot Vacuum, you may need to reconfigure them after the reset. Use the accompanying mobile app or the control panel on the vacuum to adjust settings such as cleaning modes, schedules, or Wi-Fi connections.
- Step 8: Monitor Performance
After the reset, monitor your Shark Ion Robot Vacuum’s performance to ensure that the issues you were experiencing have been resolved. If problems persist, consider reaching out to Shark customer support for further assistance.
Read also:
- Best Robot Vacuum Without WiFi Reviews
- My Shark Vacuum Wont Turn On. Best Tips
- Why is Your Shark Vacuum Brush Not Spinning? [Solved]
Conclusion
Resetting your Shark Ion Robot Vacuum can be a straightforward process, and it often resolves common issues. Following the steps outlined in this guide should help you reset your robot vacuum and get it back to optimal performance. If problems persist, don’t hesitate to consult your user manual or contact Shark customer support for additional assistance tailored to your specific model. Keeping your robot vacuum in good working order will ensure that it continues to provide efficient and hassle-free cleaning for your home.
How do you reboot a Shark robot vacuum?
To reboot a Shark robot vacuum, power it off, disconnect it from the charging dock, wait for 10-15 seconds, reconnect it to the charging dock, and then power it back on.
How do I reset my Shark robot WIFI?
Press and hold the Wi-Fi button on the vacuum.
Wait for the Wi-Fi light to blink.
Reconnect the vacuum to the Shark app following the setup process.
Why does my Shark Ion robot vacuum keep stopping?
Possible reasons for your Shark Ion robot vacuum stopping include obstacles, dirty sensors, low battery, stuck brushes, or software issues.
Why is the exclamation point red on my shark robot vacuum?
The red exclamation point on your Shark robot vacuum indicates an error or issue. Refer to the user manual for specific troubleshooting steps or contact Shark customer support for assistance.
How do I connect my shark robot to Alexa?
Enable the Shark skill in the Alexa app, link your Shark account, and use voice commands to control your Shark robot vacuum with Alexa.
We're an affiliate
We hope you love the products we recommend! Just so you know, CleanyHome.com is a participant in the Amazon Services LLC Associates Program, an affiliate advertising program designed to provide a means for sites to earn advertising fees by linking to Amazon.com.