Mold in the kitchen can be a significant problem. Mold thrives in environments with moisture, warmth, and organic materials, making kitchens, where food and water are present, susceptible to mold growth. So how to remove mold under kitchen cabinets?

3 Main Causes of Mold in Kitchen
Leaky Plumbing or Appliances
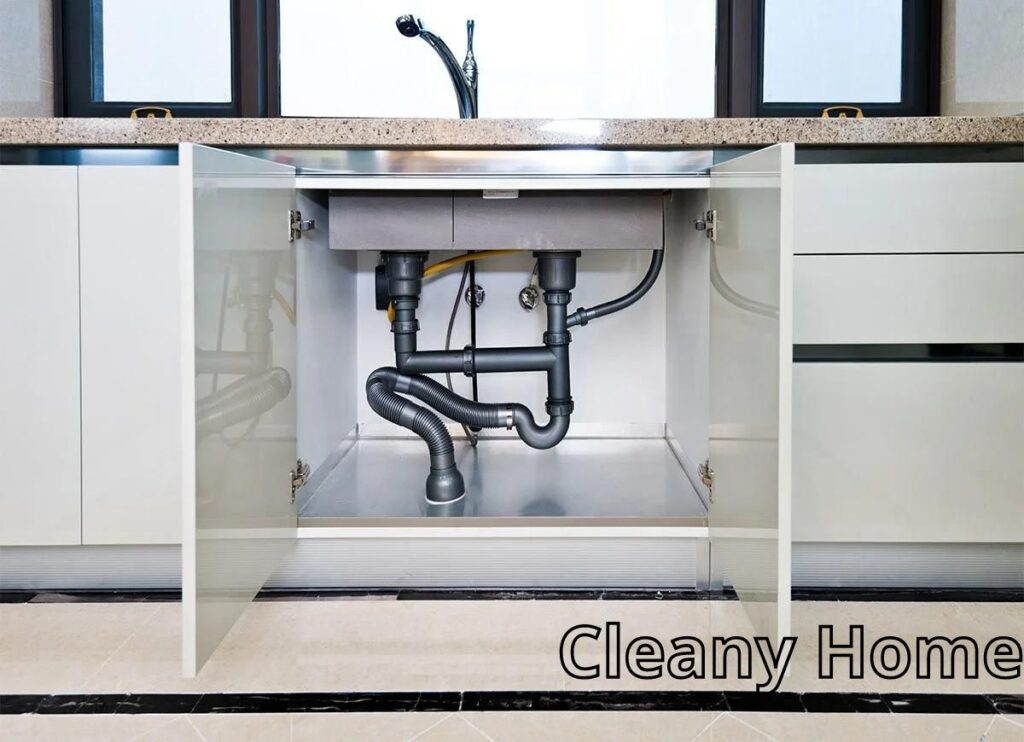
Water leaks from pipes, faucets, dishwashers, refrigerators, or any other kitchen appliances can create a constant source of moisture. Even minor leaks can lead to mold growth if not promptly addressed. Check for and fix any leaks in the kitchen promptly to prevent mold from thriving.
Poor Ventilation
Inadequate ventilation in the kitchen can lead to high humidity levels, especially during activities such as cooking and washing dishes. Steam and moisture produced during these activities need to be properly vented to the outside. Without proper ventilation, the moisture can accumulate on surfaces, creating an environment conducive to mold growth. Make sure your kitchen is adequately ventilated, and consider using exhaust fans or opening windows to reduce humidity.
Food Spoilage and Organic Waste

Mold requires organic materials to grow, and kitchens provide plenty of potential food sources. Mold can develop on food items that are not stored properly or that have passed their expiration dates. Additionally, organic waste, such as food scraps left in the trash, can attract mold if not disposed of regularly. To prevent mold growth, store food properly, promptly clean up spills, and regularly empty the trash.
It’s important to note that addressing the root cause of mold growth is essential for effective mold prevention. By identifying and eliminating sources of excess moisture, improving ventilation, and maintaining a clean and dry kitchen environment, you can significantly reduce the likelihood of mold growth. Regular inspections and prompt repairs of any leaks or water damage can go a long way in preventing mold issues in the kitchen.
Mold on Kitchen Cabinets Can Become Expensive
Indeed, mold on kitchen cabinets can become a costly problem if not addressed promptly and effectively. Mold growth not only poses health risks but can also lead to structural damage and the need for extensive remediation. Here are some ways in which mold on kitchen cabinets can become expensive:
- Structural Damage. Mold can compromise the structural integrity of wood and other materials used in cabinets. As it grows, it may penetrate and weaken the cabinet surfaces, leading to deterioration that may require repairs or replacements.
- Spreading to Other Areas. Mold spores can easily spread to other parts of the kitchen and even throughout the house. If the infestation is not contained and eliminated early, it may result in a larger and more expensive remediation process.
- Health Issues. Exposure to mold can cause a variety of health issues, particularly for individuals with allergies, asthma, or respiratory conditions. If mold contamination is extensive, medical costs related to respiratory problems or other health issues may arise.
- Replacement Costs. In severe cases, when cabinets are extensively damaged by mold, replacement may be necessary. The cost of replacing kitchen cabinets can be substantial, not only in terms of materials but also in labor for installation.
- Professional Remediation. If the mold problem is extensive, hiring professional mold remediation services may be necessary. Professional remediation can be expensive, involving the identification and removal of the mold, proper disposal of contaminated materials, and measures to prevent future growth.
- Home Value Impact. Mold issues can negatively impact the resale value of a home. Prospective buyers may be deterred by the presence of mold, leading to lower offers or difficulty in selling the property.
To mitigate the potential costs associated with mold on kitchen cabinets, it’s crucial to address the issue as soon as it’s noticed. Promptly identify and fix the source of moisture, clean and disinfect affected surfaces, and take measures to prevent future mold growth. Regular inspections, maintenance, and proper ventilation can help in avoiding mold problems in the first place.
How Can You Prevent Mold In Your Cabinets?
Preventing mold in your cabinets involves controlling moisture, improving ventilation, and maintaining a clean and dry environment. Here are some tips to help prevent mold growth in your cabinets:

- Keep Cabinets Dry. Regularly check for and promptly repair any leaks in plumbing, sinks, or appliances that could lead to water accumulation inside the cabinets. Make sure the cabinet interiors stay dry.
- Proper Ventilation. Ensure proper ventilation in the kitchen. Use exhaust fans or open windows while cooking or using appliances that produce moisture, such as dishwashers. Good ventilation helps to reduce humidity levels and prevent moisture buildup.
- Use Mold-Resistant Materials. When renovating or choosing new cabinets, consider using mold-resistant materials. Some materials, like certain types of treated wood or synthetic materials, are less susceptible to mold growth.
- Avoid Overstuffing Cabinets. Overstuffed cabinets can restrict airflow and create pockets of trapped moisture. Allow sufficient space for air circulation within your cabinets, and avoid storing items directly against the back walls.
- Keep Cabinets Clean. Regularly clean and disinfect your cabinets, both inside and out. Use a mixture of water and mild detergent to wipe down surfaces. This helps to prevent the buildup of dirt and organic matter that could serve as a food source for mold.
- Use Desiccants or Moisture Absorbers. Place moisture-absorbing materials or desiccants, such as silica gel packets, inside cabinets to help control humidity levels. Replace these regularly to ensure their effectiveness.
- Monitor Humidity Levels. Keep an eye on indoor humidity levels. Ideally, indoor humidity should be kept between 30% and 50%. Use a dehumidifier if necessary, especially in areas prone to high humidity.
- Fix Leaks Promptly. If you notice any leaks or water damage in or around your cabinets, address the issue promptly. Repairing leaks and drying affected areas quickly can prevent mold growth.
- Store Items Properly. Store items in a way that allows for air circulation. Avoid placing damp or wet items inside cabinets, and make sure food containers are tightly sealed to prevent moisture from accumulating.
- Inspect Cabinets Regularly. Periodically inspect the interior and exterior of your cabinets for any signs of water damage, discoloration, or mold growth. Catching issues early allows for prompt intervention.
By taking these preventive measures, you can significantly reduce the likelihood of mold growth in your cabinets. Consistent maintenance and vigilance in managing moisture levels will contribute to a healthier and mold-free kitchen environment.
How To Remove Mold Under Kitchen Cabinets
Removing mold from kitchen cabinets involves a thorough cleaning and disinfecting process. Here’s a step-by-step guide to help you remove mold from your kitchen cabinets:
Materials and Equipment:
- Rubber gloves
- Protective mask
- White vinegar or hydrogen peroxide
- Baking soda
- Dish soap
- Water
- Soft brush or sponge
- Clean, dry cloth
- Fans or dehumidifier (optional)
Steps:
- Safety Precautions. Wear rubber gloves and a protective mask to avoid direct contact with mold and inhalation of mold spores.
- Isolate the Area. Seal off the affected area to prevent the spread of mold spores to other parts of the kitchen. Use plastic sheeting and tape to create a barrier.
- Ventilation. Open windows and doors to improve ventilation in the kitchen. This helps in reducing the concentration of mold spores in the air.
- Remove Items. Empty the cabinets and remove all items, including dishes, utensils, and food products. Inspect these items for mold and clean them separately.
- Prepare a Cleaning Solution. Mix a solution of white vinegar, hydrogen peroxide, or baking soda with water. For white vinegar, use it undiluted. For hydrogen peroxide, you can mix it with water in equal parts. For baking soda, create a paste with water.
- Apply the Cleaning Solution. Dip a soft brush or sponge into the cleaning solution and gently scrub the mold-infested areas of the cabinets. Focus on areas with visible mold growth.
- Scrubbing. Use the brush or sponge to scrub the surface, paying special attention to any crevices or seams where mold may be hiding.
- Rinse and Wipe. Wipe down the cabinets with a clean, damp cloth to remove the cleaning solution. Rinse the cloth frequently to avoid spreading mold to other surfaces.
- Repeat if Necessary. For stubborn mold, you may need to repeat the cleaning process. If using baking soda paste, let it sit for some time before scrubbing.
- Dry Thoroughly. Ensure that the cabinets are completely dry. Use fans or a dehumidifier to expedite the drying process. Proper drying is crucial to prevent the return of mold.
- Inspect and Replace Items. Inspect the items you removed from the cabinets. Discard any items with extensive mold growth and clean the rest thoroughly before returning them to the cabinets.
- Prevent Future Mold Growth. Identify and address the source of moisture that led to mold growth. Ensure proper ventilation, fix leaks promptly, and maintain a dry environment to prevent future mold issues.
If the mold problem is extensive or persistent, it’s advisable to seek professional assistance for a thorough assessment and remediation. Additionally, consider using mold-resistant materials or paints for cabinets to prevent future mold growth.
Removing & Preventing Mold in Kitchen Fridge
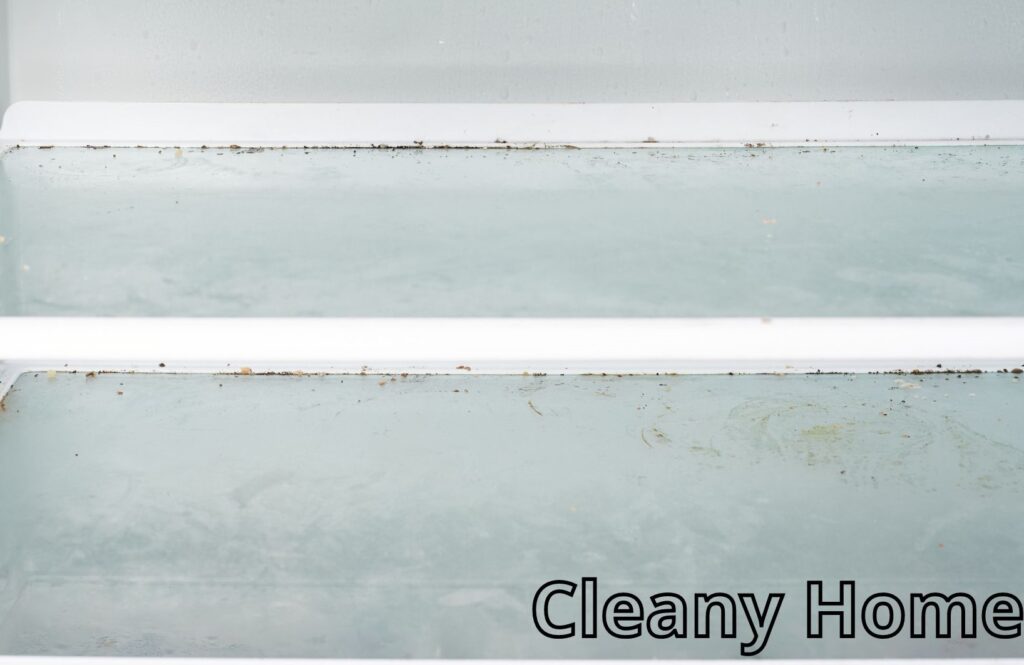
- Maintain Proper Temperature. Keep the fridge temperature at or below 40°F (4°C) to slow down the growth of bacteria and mold.
- Check and Rotate Food. Regularly check the contents of the fridge for expired or spoiled food. Rotate items to use them before they go bad.
- Use Airtight Containers. Store food in airtight containers to prevent mold spores from settling on the surfaces of uncovered items.
- Clean Regularly. Schedule regular cleaning sessions for the fridge. Wipe down surfaces, especially spills, to prevent the growth of mold and bacteria.
- Keep It Dry. Ensure that food items are dry before placing them in the fridge. Moisture promotes mold growth.
- Baking Soda Deodorizer. Place an open box of baking soda in the fridge to absorb odors and help maintain a fresh environment.
- Inspect and Address Leaks. Check for any water leaks in the fridge that might be contributing to mold growth. Address leaks promptly to prevent moisture buildup.
- Monitor Humidity Levels. Use a dehumidifier or moisture-absorbing products in the kitchen to control humidity levels, as high humidity can contribute to mold growth.
By regularly cleaning and maintaining your refrigerator, you can create an environment that discourages mold growth and ensures the safety of your stored food.
Mold On The Kitchen Ceiling
Mold on the kitchen ceiling is a common issue, especially in areas with high humidity or inadequate ventilation. It’s important to address this problem promptly to prevent further growth and potential health issues. Here’s a step-by-step guide to help you remove mold from the kitchen ceiling:
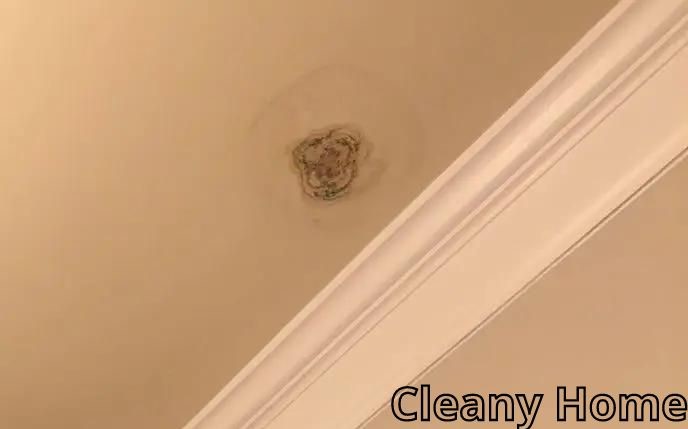
- Safety Precautions. Before starting the cleaning process, wear protective gear, including gloves and a mask, to minimize exposure to mold spores.
- Identify and Fix the Source of Moisture. Determine and address the source of moisture that led to mold growth. This could be a leaky roof, plumbing issues, poor ventilation, or condensation. Fixing the source is crucial to prevent mold from coming back.
- Ventilation. Increase ventilation in the kitchen by using exhaust fans or opening windows during and after cooking. Adequate ventilation helps reduce humidity levels.
- Isolate the Area. Seal off the affected area to prevent the spread of mold spores to other parts of the house. Use plastic sheeting and tape to create a barrier.
- Clean with Mold-Killing Solution. Mix a solution of white vinegar, hydrogen peroxide, or a commercial mold-killing product with water. Apply the solution to the moldy areas using a sponge or cloth. Scrub gently to remove the mold.
- Use Baking Soda Paste. For stubborn mold, you can create a paste using baking soda and water. Apply the paste to the affected areas and let it sit for a while before scrubbing. Baking soda is effective at both cleaning and deodorizing.
- Rinse and Dry. Wipe down the ceiling with a clean, damp cloth to remove the cleaning solution. Ensure the area is thoroughly dried. Consider using fans or a dehumidifier to expedite the drying process.
- Repaint if Necessary. If the mold has stained the ceiling and cannot be completely removed, you may need to repaint the affected area. Use a mold-resistant paint to prevent future mold growth.
- Inspect and Repair. Inspect the ceiling for any signs of water damage, leaks, or structural issues. Repair any problems you find to prevent recurring mold issues.
- Prevent Future Mold Growth. Take measures to prevent mold from returning. This includes fixing leaks promptly, improving ventilation, and maintaining low humidity levels.
- Regular Maintenance, Perform regular inspections and cleaning to ensure that the kitchen ceiling remains free of mold. Address any issues promptly to prevent them from escalating.
If the mold problem is extensive or if you have concerns about your ability to handle the situation, it’s advisable to consult with professionals for a thorough assessment and safe remediation.
Read also:
- How to Remove Orange Mold in Shower and Bathroom
- Best Сarpet Сleaner for Berber Carpet [Best Tips]
- How to wash O-Cedar mop head great guide
Conclusion
While small mold problems can often be managed by homeowners, it’s essential to be cautious and seek professional assistance if the issue is extensive, recurring, or if there are health concerns. Professional mold remediation services have the expertise and equipment to handle complex situations safely and effectively.
Here is the video with professional mold fighters.
How do you get rid of mold under cabinets?
To get rid of mold under cabinets:
Identify the source of moisture and fix it.
Isolate the area and ventilate.
Mix a mold-killing solution (vinegar, hydrogen peroxide, or commercial cleaner).
Apply the solution, scrub the mold, and wipe the area dry.
Ensure proper ventilation to prevent future mold growth.
Do moldy cabinets need to be replaced?
Moldy cabinets may need to be replaced if the mold has extensively damaged the structure or if cleaning is ineffective. Assess the severity of the mold and consider consulting professionals for advice.
How do I get rid of mold under my kitchen sink?
To get rid of mold under your kitchen sink:
Identify and fix leaks.
Remove stored items.
Clean with a mold-killing solution.
Scrub affected areas.
Dry thoroughly and fix the source of moisture.
How do I prevent mold in my kitchen cabinets?
To prevent mold in kitchen cabinets:
Maintain proper ventilation.
Keep cabinets dry; fix leaks promptly.
Use moisture-absorbing materials.
Regularly clean and disinfect.
Store items properly to allow air circulation.
What does toxic mold look like?
Toxic mold can appear in various colors, including green, black, or brown. Stachybotrys chartarum, often called black mold, is a type associated with health concerns. However, color alone doesn’t determine toxicity; professional testing is required for accurate identification.
Is vinegar or bleach better for killing mold?
Vinegar is generally preferred over bleach for killing mold. It’s effective, safer, and less harmful to the environment. Bleach can be harsh, may not prevent mold regrowth, and can emit strong fumes.
We're an affiliate
We hope you love the products we recommend! Just so you know, CleanyHome.com is a participant in the Amazon Services LLC Associates Program, an affiliate advertising program designed to provide a means for sites to earn advertising fees by linking to Amazon.com.

