The Shark Robot vacuum cleaner is one of the most helpful smart home devices that you can rely on to clean your hard floors and carpets. The Shark robot vacuum cleaner uses a combination of sensors and mapping technology to navigate around a room, avoiding obstacles and cleaning the floors. There are many reasons that can prevent your Shark robot battery from charging, such as outdated firmware, dirty charging pins, damaged battery, impair power cable or a faulty wall outlet. Now I am going to discuss the issue what to do if Shark Robot not charging.
Table of Contents
Why is my Shark Robot Not Charging?
There are several reasons why your Shark Robot may not be charging. Here are some possible solutions to help you troubleshoot the issue:
- Check the power source: Ensure that the charging dock is properly plugged into a functioning power outlet. If the outlet is not working, try plugging the dock into a different outlet.
- Check the charging contacts: Make sure that the charging contacts on the robot and the dock are clean and free from any debris. Clean them gently with a soft cloth or brush.
- Reset the robot: Try resetting the robot by pressing and holding the power button for 10 seconds. Then, try placing it on the charging dock again.
- Check the battery: If the battery is not holding a charge, you may need to replace it. Contact Shark customer service for assistance in obtaining a replacement battery.
- Check for obstructions: Make sure there are no obstacles between the robot and the dock that could prevent it from docking properly.
How To Fix Shark Robot Vacuum Not Charging?
If your Shark robot vacuum is not charging, here are some steps you can take to troubleshoot and fix the issue:
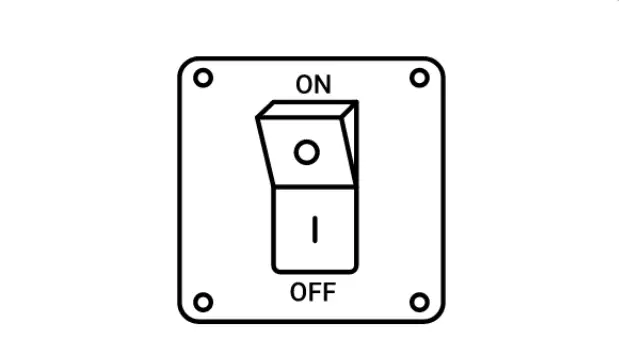
Power ON the Robot
If the robot is completely drained of battery, you may not be able to turn it on until it has charged for several hours. In this case, you should place the robot on the charging dock and make sure that the charging contacts are clean and free from debris. Then, leave the robot to charge for several hours before attempting to turn it on again.
If the robot is not completely drained of battery, turning it on may help you determine whether there are any other issues with the robot that may be causing it not to charge. For example, if the robot turns on but the battery level does not increase when it is placed on the charging dock, there may be an issue with the charging contacts or the battery itself.
In any case, if your Shark robot vacuum is not charging, you should follow the troubleshooting steps recommended by the manufacturer to determine the cause of the problem and find a solution.
Clean the Proximity Sensors
If the robot is not properly docking on the charging dock, the proximity sensors may be dirty or obstructed, preventing the robot from detecting the dock. In this case, you can try cleaning the sensors using a soft, dry cloth or a cotton swab. You should also make sure that there are no obstacles between the robot and the dock that may be blocking the sensors.
While cleaning the proximity sensors can be helpful, it may not resolve the issue of the robot not charging. If the robot is still not charging after cleaning the sensors, you should follow the other troubleshooting steps recommended by the manufacturer to determine the cause of the problem and find a solution. This may include checking the charging contacts, resetting the robot, checking the battery, or contacting customer service for assistance.

Clean Your Charging Dock
If the charging dock is dirty, you can clean it by first unplugging it from the power source. Then, use a soft, dry cloth or a damp cloth with mild soap to gently wipe down the charging dock. Be sure to clean any debris or dirt from the charging contacts on the dock and the robot. Once the charging dock is clean, plug it back in and attempt to charge the robot again.
While cleaning the charging dock can be helpful, it may not resolve the issue of the robot not charging. If the robot is still not charging after cleaning the dock, you should follow the other troubleshooting steps recommended by the manufacturer to determine the cause of the problem and find a solution. This may include checking the charging contacts, resetting the robot, checking the battery, or contacting customer service for assistance.
Clean the Charging Sensors
Cleaning the charging sensors may be necessary to fix the issue of a Shark robot vacuum not charging if there is any dirt or debris on the charging sensors that is preventing the robot from making a proper connection with the charging dock.
To clean the charging sensors, follow these steps:
- Turn off the robot and unplug the charging dock from the power source.
- Gently wipe the charging sensors on the robot and the charging dock with a soft, dry cloth or a cotton swab. Be sure to remove any dirt or debris that may be on the sensors.
- Check the sensors for any signs of damage or wear. If the sensors are damaged, you may need to replace them.
- Once the sensors are clean, plug the charging dock back in and place the robot on the dock to see if it begins charging.
If the robot still does not charge after cleaning the charging sensors, you should follow the other troubleshooting steps recommended by the manufacturer to determine the cause of the problem and find a solution. This may include checking the charging contacts, resetting the robot, checking the battery, or contacting customer service for assistance.
Align Your Robot Properly
Proper alignment ensures that the charging contacts on the robot are properly aligned with the contacts on the dock, allowing the robot to receive a charge.
If the robot is not making a proper connection with the charging dock, it may not charge or may charge slowly. In this case, aligning the robot properly on the charging dock can help ensure that it charges properly.
To align your robot properly on the charging dock, follow these steps:
- Ensure that the charging dock is plugged in and turned on.
- Place the charging dock on a level surface, away from any obstacles that may obstruct the robot’s path.
- Position the robot in front of the charging dock, with the charging contacts on the robot aligned with the contacts on the dock.
- Slowly move the robot forward until it makes contact with the dock. You should hear a beeping sound indicating that the robot has detected the dock.
- Wait for the robot to make a proper connection with the dock and begin charging. This may take a few seconds.
- If the robot does not make a proper connection with the dock, try adjusting its position slightly to ensure that the charging contacts are aligned properly.
- Once the robot is properly aligned on the charging dock and charging, leave it to charge until the battery is fully charged.
Replace Your Battery
If you have followed the other troubleshooting steps recommended by the manufacturer and the robot is still not charging, you may need to replace the battery. To replace the battery on a Shark robot vacuum, follow these steps:
- Turn off the robot and unplug the charging dock from the power source.
- Locate the battery compartment on the robot. Depending on the model of the Shark robot vacuum, the battery compartment may be located on the side or the bottom of the robot.
- Use a screwdriver to remove the screws that hold the battery compartment cover in place.
- Remove the battery from the compartment.
- Insert the new battery into the compartment and replace the battery compartment cover.
- Use a screwdriver to tighten the screws that hold the battery compartment cover in place.
- Plug the charging dock back in and place the robot on the dock to see if it begins charging.

Read also:
Get a Replacement
To get a replacement, you should follow these steps:
- Contact the manufacturer’s customer service: If your Shark robot vacuum is still under warranty, contact the manufacturer’s customer service to explain the issue and request a replacement. They may ask you to provide proof of purchase, the model number of the robot, and a description of the issue.
- Determine eligibility for a replacement: The customer service representative will determine if your Shark robot vacuum is eligible for a replacement based on the warranty and the issue at hand. If the robot is eligible for a replacement, the representative will provide you with instructions on how to proceed.
- Follow the manufacturer’s instructions: If the manufacturer determines that your robot is eligible for a replacement, follow their instructions carefully to complete the process. This may involve returning the defective robot, filling out paperwork, or waiting for a replacement to be shipped to you.
- Set up and test the replacement: Once you receive the replacement robot, carefully read the instructions to set it up properly. Test the robot to ensure that it charges properly and performs as expected.
If your Shark robot vacuum is not under warranty, you may need to purchase a replacement robot vacuum. When purchasing a replacement, be sure to consider the features and capabilities that are most important to you, such as suction power, battery life, and navigation capabilities. You may also want to read reviews and compare prices to find the best option for your needs and budget.
Conclusion
Solving the problem of a Shark robot vacuum not charging can be relatively easy in some cases, while in other cases it may be more challenging.
Some common reasons why a Shark robot vacuum may not be charging include a dirty charging dock, dirty charging contacts on the robot or the dock, a faulty power outlet, a damaged charging cord or adapter, or a damaged battery.
Many of these issues can be resolved by following the manufacturer’s recommended troubleshooting steps, such as cleaning the charging dock and contacts, checking the power outlet, and inspecting the charging cord and adapter for damage.
However, if the problem persists after following the recommended troubleshooting steps, it may require more advanced knowledge or the help of a professional to diagnose and fix the issue.
If the Shark robot vacuum is still under warranty, contacting the manufacturer’s customer service for assistance is also a good option. They may be able to provide further troubleshooting steps, or determine if the robot needs to be repaired or replaced.
Overall, while it may be frustrating to encounter a problem with a Shark robot vacuum not charging, it is usually possible to resolve the issue with some troubleshooting and potentially the help of the manufacturer or a professional.
Why is my shark robot vacuum not charging?
There could be several reasons why your shark robot vacuum is not charging. Some common causes include a faulty power outlet, a damaged charging dock, a dirty charging contacts, or a malfunctioning battery.
How do you fix a robot vacuum that won’t charge?
To fix a robot vacuum that won’t charge, you should check the power outlet, clean the charging contacts, inspect the charging dock, and try reinserting the battery. If these steps don’t work, contact the manufacturer for further assistance or consider getting a replacement battery or charging dock.
Is there a reset button on shark robot vacuum?
Yes, there is typically a reset button on Shark robot vacuums. However, the location of the reset button may vary depending on the model of the vacuum. You can consult the user manual or contact Shark customer support to locate the reset button on your specific model of robot vacuum.
How long do shark robot batteries last?
The battery life of a Shark robot vacuum can vary depending on the model and usage. On average, the battery life of a Shark robot vacuum is between 60-90 minutes per charge.
Can you replace Shark robot battery?
Yes, the batteries on some models of Shark robot vacuums are replaceable.
We're an affiliate
We hope you love the products we recommend! Just so you know, CleanyHome.com is a participant in the Amazon Services LLC Associates Program, an affiliate advertising program designed to provide a means for sites to earn advertising fees by linking to Amazon.com.